
Prep Before you Paint
Before you begin your next project there are many tips, tricks and best practices you can follow that are used by professional painters daily, and can help improve your results. Painting a room, interior or exterior involves many details that are sometimes easily overlooked. Understanding preparation best practices like the impact of temperature on paint, or how weather conditions affect the application, and the necessary steps in preparation will make your paint application and finishing easy and your project a success.
Tools You'll Need
Prepping
Soap & Water or
Light Cleaning Agent
Drill or Screwdriver
to remove switch plates
Scrubby sponge
Putty knife
Wall Repair
Ventilation masks
Disposable gloves
Microfiber cloth
Painter’s tape
Wood filler
Sand Paper
Dry Cloth
Window Coverings
Painter's Tape
Kraft Paper
Drop Cloth
Protecting Furniture
Plastic Covers
Painter's Tarp
Drop Cloths
Preparing a Room
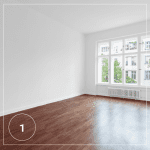
Step 1: Remove Furniture
When painting a room remove furniture to provide ample space for you to move around while working.
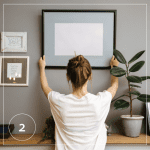
Step 2: Remove Wall Decor
Take down any artwork and store them in a clean space. If you have lighting such as sconces affixed to the wall be sure to tape and cover them with plastic if you’re unable to remove them from the wall.
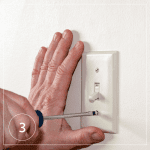
Step 3: Remove Switch Plates & Outlet Covers
Using a flathead or Philips screwdriver remove all switch plates and outlet covers and set them aside until the painting is done and dry.
Step 4: Repair & Clean Walls
Spackle all the holes and dents you can see on your walls. Spread the spackle thinly across the holes and allow it to dry for 24 hours.
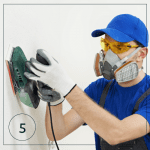
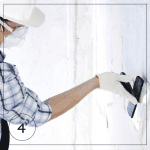
Step 5: Sand the Wall
Be sure to wear a facemask when you do this so you do not inhale any paint or spackle dust. Rub the entire surface to smooth out any areas you spackled and to add tooth to the wall. This step ensures your wall holds primer and paint effectively. If you plan on painting baseboards, trim, or doors, make sure to sand them as well.
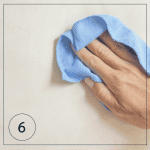
Step 6: Wash the Walls to Remove Dirt and Stains
Before you paint it’s best to wash down all the walls and remove all the dust with a gentle solution of warm water and light soap. This will ensure your walls are clean and dry and ready for paint.
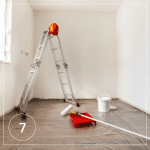
Step 7: Cover the Floors
Use plastic covers and a painter’s tarp to protect the floors from paint spatter. Plastic covers can be purchased at your local hardware or furniture store.
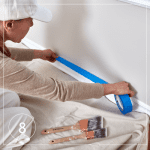
Step 8: Tape Around Baseboards and Windows
Use painter’s tape to cover up any trim you don’t want to paint. Press the edge of the tape firmly where it meets the wall so you won’t have any paint bleeding underneath.
CCA Member Products
Buy from the Best
CCA Member Companies and their products comply with ALL Canadian regulations – making them the most sustainable products available on the market. When you choose paint and coatings products manufactured and sold by our members you are choosing quality paints with product formulations that have been engineered to the highest standards. Take a look at what our members have to offer.